The Scots might call Kale “Cattle Fodder”! but it’s my favourite “grow myself” vegetable. Here’s why:
Fantastic off season food
I planted them in April last year and have been eating them since September, all through autumn, and all winter, right up until this week.
They are amazingly
easy to grow, trouble free (once they are high enough to get away from slugs)
and the best value plants in my vegetable garden. Chopped kale leaves in my
local supermarket are shockingly expensive – over a pound for half a kilo!
Kale gives you more
After the first flush of new spring leaves the Kale will try to flower. The flower erupts from the top of the plant. Snap this off and eat it. Yum. These flower sprouts are delicious.
The flowers look similar to green sprouting broccoli.
A few weeks after eating the top flower the plants will sprout a load more flowers from the sides between the leaves. I take the plants out of the ground when these flowers are finished, usually by mid April.
Lots of food from very little space
I've just
planted out 28 plants for the coming year. It sounds a lot, but this winter I
could have eaten at least twice as much kale as I was growing.
Here they are all planted.
One row of large curly kale and two rows of Italian black Kale. Planted about 25cm apart in three staggered rows. Lots of food in very little space.
Cheap and easy
I planted
these from seed in the middle of January and kept them near the windowsill in
my kitchen. As soon as they had grown two real leaves I moved them into bigger
pots and seed trays and put them out into the greenhouse for a few weeks.
This year
is the last year I follow this traditional method. It’s too time consuming. Seed
has become so reliable that I can plant one seed directly into small pots and nearly all
of them will come through.
I've never liked
the cell seed trays that are all joined together. The small plants are hard to get
out without disturbing the roots and so suffer when putting them into the
ground.
Tapping little plants out of small pots is much easier, the roots are less stressed and so they do better when
planted out.
If you don't have the time or desire to do this you can easily buy baby plants in most garden centres or DIY garden departments from the middle of March and they are very cheap when they are small.
 |
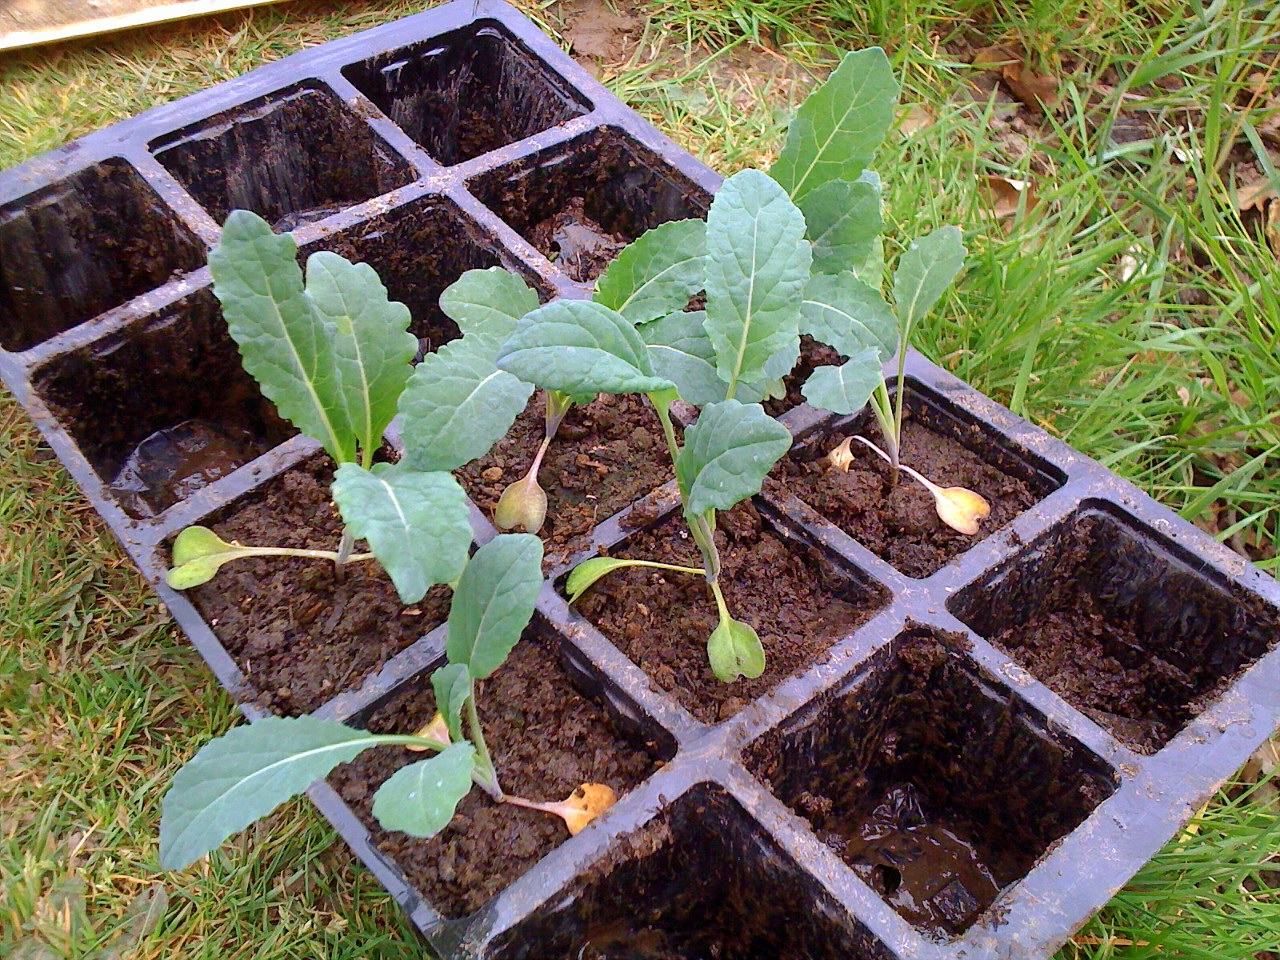
| In seed tray cells - I don't like these as the baby plants get stressed when pushed out |
 |
| baby plants in little pots seem to grow on better and suffer less stress when planted in the ground |
If you don't have the time or desire to do this you can easily buy baby plants in most garden centres or DIY garden departments from the middle of March and they are very cheap when they are small.
Easy to plant out
The soil
was dug over and weeded a week or so ago and I added some organic seaweed
pellets to the soil. Kale belongs to the Brassica family and are hungry plants (thats why they are so good for you) This extra feed will make sure there are enough trace minerals, nitrogen, phosphate and potassium in the soil for a good crop.
Here’s the planting sequence
1. Pop out of pot or tray
 |
| This little plant has been pushed out of a cell tray |
2. Dig small hole slightly deeper than the plant root ball
 |
| The two little heart shaped side leaves are the first leaves and will drop off as soon as the plant is established |
3. Fill the hole with soil and a little the over the top of the soil from the pot. Use your fists and push the whole root ball firmly into the soil so it moves down into a little depression.
 |
| Yay - out in the real world! |
4.Shuffle
around the plant pushing down with heels to create a well around the plant and compact the soil slightly. Kale are tall plants with big leaves and need to root in firm soil to
prevent them rocking about in the wind.
 |
| Yes those are my wellies |
5. Fill the depressions with water (old gardeners call this puddling in) and away they will go!


