Wednesday, 19 February 2014

Out with the old, in with the new

In love with leeks

Leeks are great food to grow, no trouble in the ground and I get lots of them from a very small area. They are easy to grow in the UK's not too dry and not too hot climate. I love growing them - they taste so much better fresh from the garden and as they are expensive to buy. Seeing them standing, so resolute and  so exhberant makes me smile.
I normally grow about 50 a year, this guarantees me enough leeks in the autumn and winter to eat about four a week.

A few weeks ago I planted a whole pile of seeds in trays and put them in the cold greenhouse and they have already germinated.

Seed trays with leeks - you can't see them yet,
but they are there - tiny weeny little leeks just
unfurling from  their seeds. There are also broad bean
 seeds in the toilet rolls. 


New bugs  make growing things very difficult

As the climate in southern England changes we are becoming home to all sorts of new pests and plant diseases. Leek moths are one of them. 
I've never seen a leek moth, but I'm not impressed. They lay their eggs on leeks and when they hatch the maggots eat tunnels back and fore inside the leek and spoil them. I lost all of my leeks to this pest this autumn. No leeks to harvest this autumn and winter just gone.
:-(
It seems the only way to guard against leek moth it is to plant leeks in ground that has been free of leeks for at least 5 years. The only area of my garden that hasn't grown leeks in the last 5 years is my strawberry beds. So I am digging out one of my strawberry beds to grow leeks.

Out with the old

Its no big deal, old gardeners wisdom says that strawberry beds should be dug out every third year or so. As the plants get older they become woody and more prone to throw out runners instead of fruit. My oldest strawberries have been in for six years so I am going to dig out that bed and grow leeks there.

My strawberry beds are the two closest
beds after the first bed (flowers)
 Here they are netted to protect the fruit from birds

In between one rain storm and another I dug through the oldest bed of strawberries. Strawberries are very tenacious plants. Just like their cousins buttercups, they grow deep woody roots with loads of fibrous offshoots. Its very difficult to pull them out so they have to be dug up.

I chose the right hand bed to dig out as this
bed has been in the longest and was
 overcrowded with old plants


The woody roots of strawberry plants.
They all went in the compost

All gone!

In with the new!

The baby leeks won't be ready to plant out for at least two months, so instead of leaving the bed empty I will plant some mini broccoli as soon as the soil is warm enough, fingers crossed for the the middle of march. To help the soil warm up and dry out I'm cheating - I'm covering the soil with a black plastic sheet to keep off  any more rain and absorb heat from the sun.

These mini broccolis (called sprouting turnip tops here in the UK) are quick to grow, I'll be eating them at least a month before the standard type broccoli will be ready to harvest. Yum! they are delicious and I have never seen them for sale in the shops.

These grow 6 to 10 inches tall . They are cool weather plants, one
variety for spring and one for autumn sowing.

Monday, 17 February 2014

The death of a cherry tree - and "oh god my back aches"

Sad news of an old friend going.

I lost the old cherry tree outside the front of my house. Months of brutal high winds and rain this awful winter took its toll, causing a split in the trunk and dropped branches. I will miss it this spring - the blossom was beautiful.

Blossom from the cherry tree from spring 2012


Silver lining in the black cloud

In between one storm and another, our local council sent some people to cut down the tree, chip the branches.and remove the logs. It was my day off work - Luck that I was here when they started the job!
I bribed the workmen with big mugs of builders tea and they were kind enough to dump the spoils outside the allotment garden gates.


Me and my mate Doug spent the rest of the day moving wheel barrows of chippings the 500 metres or so from the allotment garden gate to various places in our gardens. 26 loads later...... God my arms and back ached the next day.

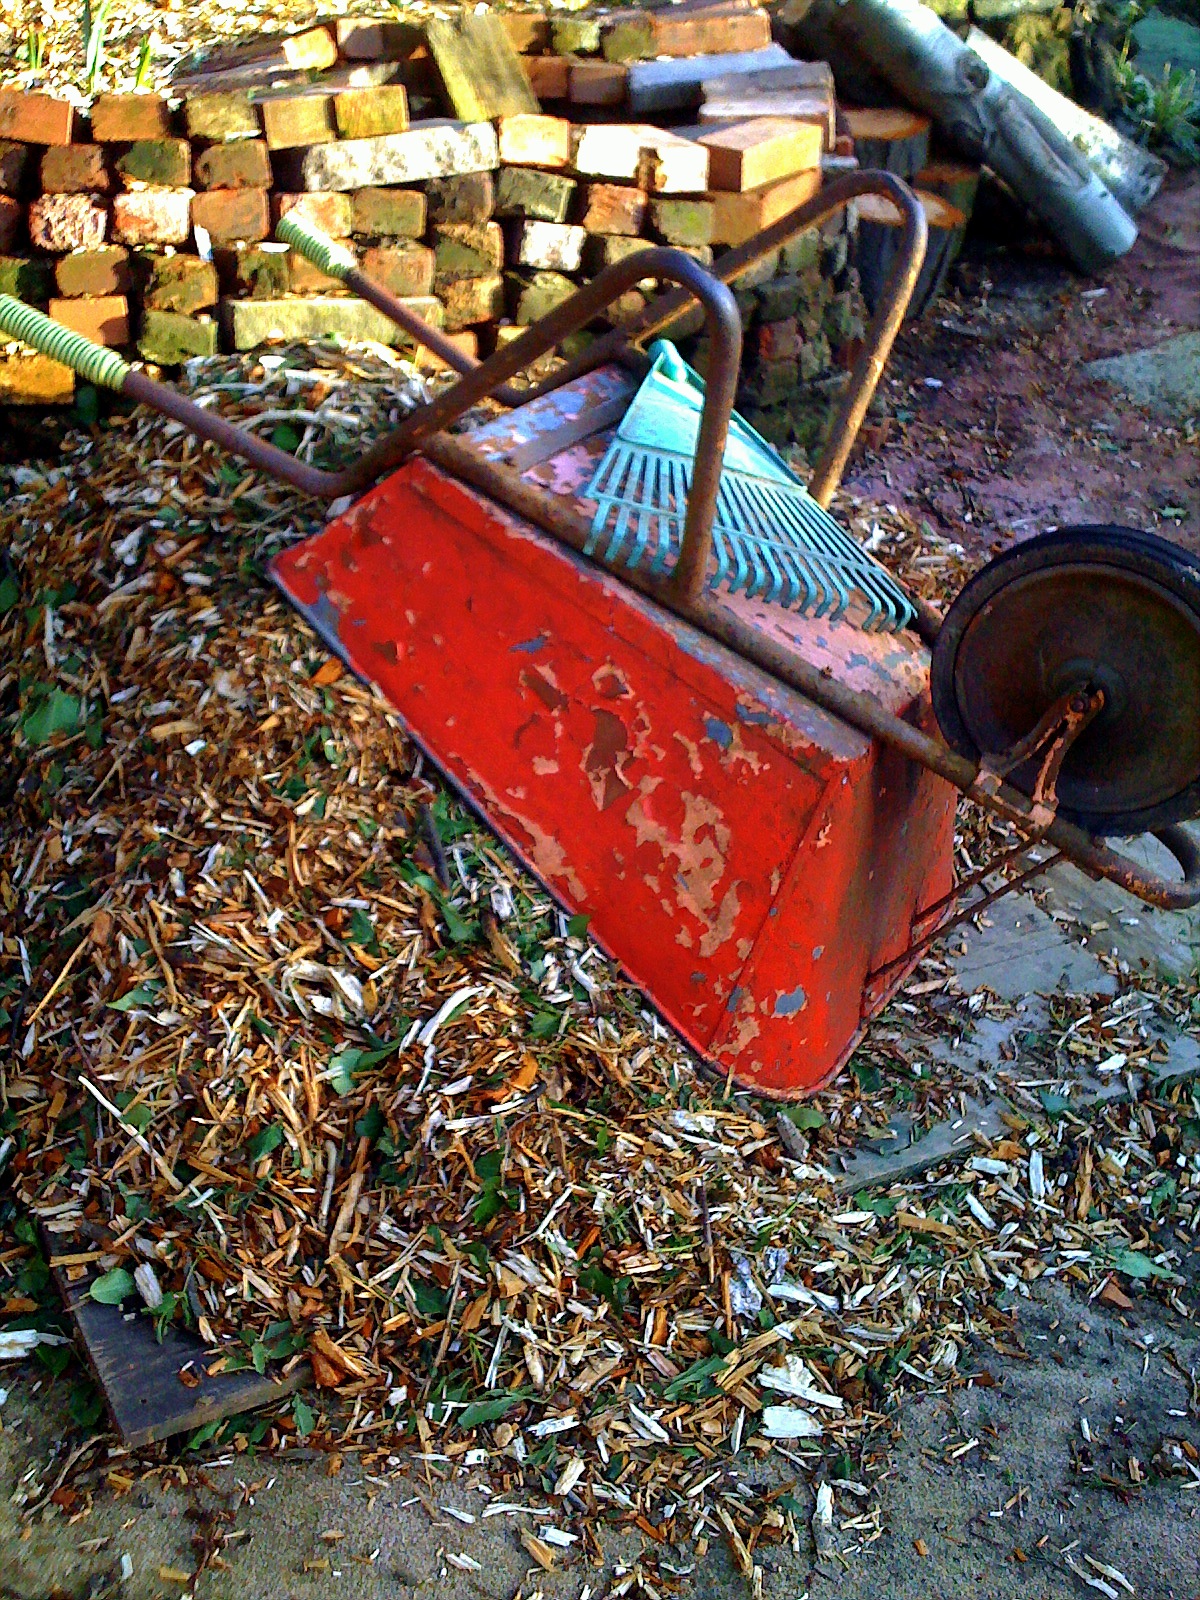
My old wheelbarrow - Dave, on top of
a pile of wood chips

I have a love/hate relationship with my wheelbarrow. It's a very old, solid wheel type. Its made from spot welded galvanized steel sheets - indestructible (which is why I love it) and heavy as hell (which is why I hate it). It was left to me by the old guy who had my garden before me and is named Dave after him.

Using the wood chippings

I spread a good two inches of home made compost first, and then used some of my share of the chippings to cover my two raspberry patches and the soil at back of the pond with a good 2 inch (5cm) layer.
Wood chippings like this make a fantastic weed suppressing layer (Posh word is "Mulch").
Mulch works by stopping the light getting to weed seeds so they don't grow.
The chips will slowly rot away and leave behind a layer of light soil full of worms. Great stuff.
I expect this layer to last a year or so, depending on the weather.  

my two raspberry beds

I have two raspberry beds. 
  • The nearest one is autumn fruiting and the new canes will pop up some time in March. I cut the old canes down in early December after the last of the leaves had fallen
  • The furthest bed is summer fruiting and these canes came up in late summer after the old canes had finished fruiting. I cut out the old canes in August so all the growth would go into the new canes.

Raspberries are woodland margin plants in the wild and they like light humus rich soil. (Humus is the posh word for rotted down plants)  I normally mulch them with a two inch (5cm) thick layer of leaves in early spring, These wood chips will do the job just as well.

Behind the pond

I'm not sure that mulching behind the pond was such a good idea. I covered over a whole load of bulbs that were just showing. They'll now have to fight through a thick layer of chipping which may hold back their growth or swamp them, some might be too small to push through - especially the small crocus and iris


chippings covering the bare soil behind
my new pond

Waste not want not

I'll use the unused chippings underneath my fruit bushes to do the same mulching job..... Just as soon as we get a break in the weather.

I have no idea what I am going to do with the logs, but there will be a home for them somewhere.They are such a fantastic colour and given a few months to start rotting into the soil, will become a great home for bugs to feed my birds.

Fantastic bright orange cherry wood logs 

Sunday, 16 February 2014

"If you can't go up, then go down" - the no dig pond.


I always wanted a pond on my allotment garden. Trouble is I have a huge tree that takes up a lot of my space and the tree roots make it very difficult to dig a deep enough hole. So instead of going down I went up.

This pond took me almost three years to do. Finding enough soil to use to make a bank and enough bricks to make the wall took me ages. I finally managed to finish it with a lot of help from my friend Shanti in October 2013. Just in time to plant the bank with some spring bulbs.
The amazing winter rains have filled it, so all thats left to do is find some toad spawn this spring and cross my fingers...


my lovely finished pond

In the beginning

It all started with somewhere to put the sticks and wood, you know, all those branches that are too thick to put in the compost and too much bother to cut with a saw. I stacked them under my big tree on a slight bank, where it was too dark and dry to grow any food.

Feed the birds

As the pile grew I noticed that it became a haven for small birds, especially wrens, robins and sparrows. They feed off the small insects that live in the rotting wood. 
I deliberately collected wood for the hedge and over the last few years I've created a very substantial stick hedge. It's a natural bird feeder and windbreak for the cold east wind. It also blocks the view of some ugly buildings. 
You can see the hedge in the background of the following picture. 
I've pushed some very large branches through the hedge and its stable - still standing firm after all the wild windy weather this winter. 

Finished! I had just enough bricks.

Toad envy

I've always wanted a pond somewhere in the garden. For the toads. Toads are the best slug replant there is, they can eat their own weight in slugs every day in the summer months. Even though I'm an organic gardener I've only ever seen one in my garden. 
I'm not killing them with sprays or pellets but its difficult to keep them as they won't stay in a garden unless there is a year around water source.  

The pond problem

Putting the pond under the big tree is the best place for me. Its such a large piece of unusable ground. The tree takes all the moisture from the soil in the summer and nothing much grows other than woodland flowers. But there was no digging down. My god - the tree roots! And the last thing I wanted was to stress my lovely old tree by sawing through roots. 

A problem shared

A friend suggested that I build up instead of down and I started collecting soil and bricks to make the bank in front of the stick pile wider. I built the wall and the bank bit by bit over three years! Finding free wheelbarrow loads of soil was not so easy.
As I built I tilted the bricks backwards into the bank and stepped them into the bank as the wall got higher. This is an old way of facing a bank and means that the bricks needed no mortar to keep them in place.
The pond is ridged. Formed of a big plastic pot from a tree which made it much easier to build around.
Its lined with builders damp proofing plastic sheet. 

the brick spacing is not perfect,
 but then very few of them are the same size and I'm not a bricky!

The final touches

The top layers of bricks gave me a bit of a headache. How to stop them slipping into the pond? Backwards tilting bricks into the soil at the back of the pond worked very well, but wedging the front ones together is a bit flimsy. We'll see how that holds up over time.. 
Later in the year when I have some money I will plant the pond with water iris, rushes and grass. :-)

The top bricks
 all I need now is some plants to soften the edges

I'll plant house leeks and
some other wall lovers  in between the bricks


The Sprung Spring - cheerful early bulbs show themselves in between the rain storms

This week the early spring bulbs popped their heads up and opened out in the fleeting sunshine between the storms.

The very very first flowers

Snowdrops. 
I don't have many - these few delicate little lovelies were planted before this garden was in my care. I promise myself more every year and so far have forgotten to buy and plant more each autumn.

This year has been exceptionally wet (luckily here in my part of Isleworth we are up on a small hill - so no flooding) but also very mild. Only the lightest of frosts, so all the spring bulbs are flowering early.


And then

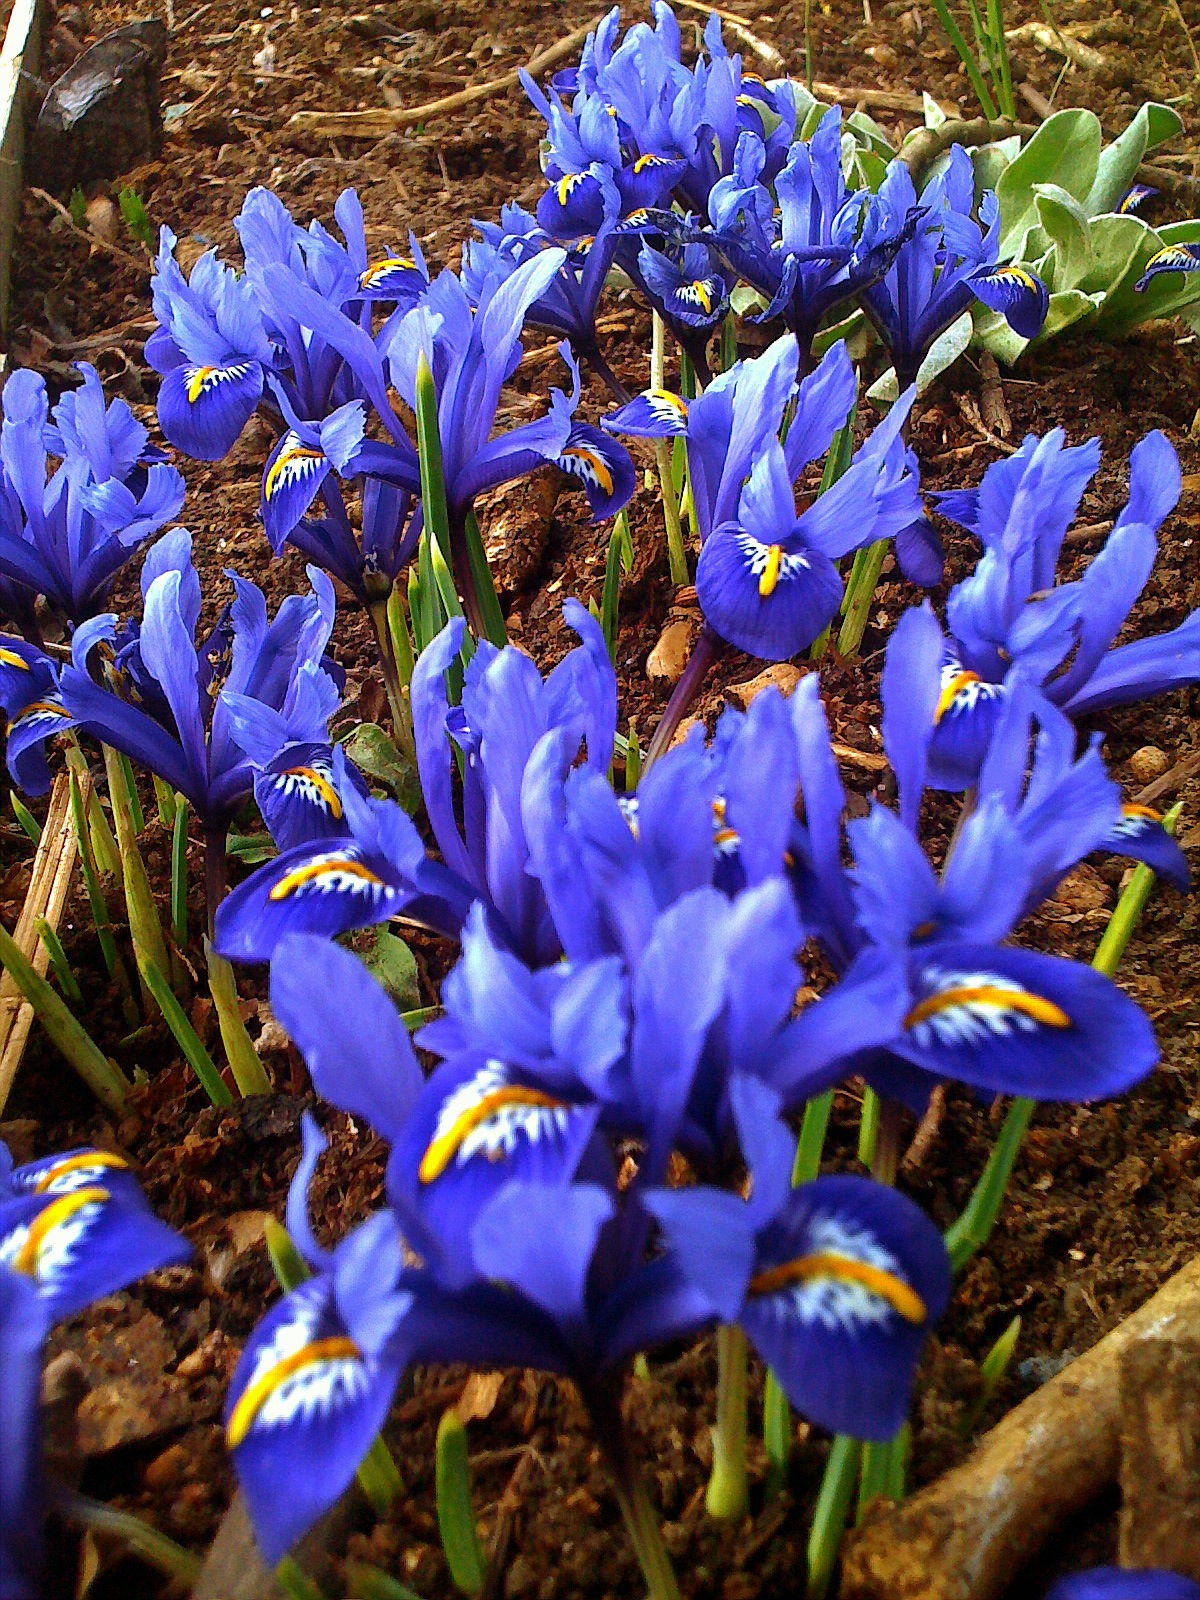
Early miniature Iris
These are one of my favorite early spring bulbs. They spread themselves a little further each year. Beautiful blue with yellow accents. Just lovely.

This Iris has just opened out
 in the bright  morning sun


Later in the day - a carpet of mini iris
all just 3 inches tall (8cm)

In a sunnier area of the garden 

Crocus
These are very early, They are usually at least two weeks after the iris, but this year they are flowering at the same time. They do look lovely together! 
:-)

light purple - the yellow in the middle is so
bright against the purple flower
Sunburst of yellow

Waving from the back by the shed

Golden daffodils in the last of todays days sun. I love daffs - beings a Welsh woman they remind me of home.


Thursday, 28 November 2013

There is no "AWAY" in the phrase "thrown away"

This phrase is something I picked up from my one of my G+ people, . Its got staying power and pops into my mind surprisingly often.....

Its my garden day on Wednesday and I was pleasantly surprised to find a new pile of garden waste and five bags of leaves sitting next to my newish (and almost full) compost. A very welcome garden gift.

Huge pile of autumn garden waste

Five rubbish bags of  leaves

There's far too much stuff to put on the existing compost, its already taller than me, so until it shrinks a bit there is no room for more.
Well then!  Scrap todays leisurely path sweeping plan and find somewhere to put all this lovely stuff.
One of my other compost bins is nearly empty, there's just a one or two wheel barrow loads left in the bottom. It's easy to find places in the garden that need a compost blanket for the winter.

my barrow - full of home made compost

As I'm shovelling the last bit out of the bin I find these:


A shredded plastic bag and a yoghurt carton top.
Its the usual suspects.
Assorted bits of plastic.

This compost is over two years old, mostly everything has disappeared, leaving me with dark brown, sweet smelling, light fluffy home made compost.

Apart from the plastic that I didn't spot in the green and sticks that originally went in. 
Plastic doesn't disappear at all - the plastic bag is looking a bit ragged, but the yogurt top is still exactly that. A bright pink plastic yogurt top. Over two years later............

I pick them up and put them in my waste bag, also plastic and in my head a sad voice is saying : There is really  no "AWAY" in the phrase "thrown away". There is only putting this stuff somewhere else.
This bothers me.

I'm a sort of organic gardener, and I know I'm very lucky. I don't depend on growing my food to eat, I earn enough money to buy all my food but choose to grow as much as I can for the health benefits. 
I work in the city, inside all day and mostly sitting down. Growing my own vegetables provides exercise, the contact with nature, time to be outdoors, and truly fresh, chemical free food.  These all contribute to my well being.

I choose not to spray and I don't use any sort of chemical fertilisers. I share my home grown food with everything else that wants to eat it too. I delight in the insects, birds and animals that this encourages into my garden.
I've gotten over the need for perfect looking vegetables. I've learned that the strange shapes taste just as good as the perfect ones. I now know that odd shapes are normal and that perfect vegetable are the real weird.

But plastic really bothers me. Regardless of how hard I try, contact with plastics in food cultivation, storage and preparation is almost impossible to eliminate. 
It bothers me that the plastics I acquire and then throw away are not going to "go" anywhere. 
They don't decompose in the way organic substances do. We just get hide it away by burying them in the ground or burning them. 
In the ground, they'll be there for hundreds and hundreds of years, leaking unwanted chemicals and volatile gasses into the surrounding soil and water.
Burning them does the same only faster by dispersing the chemicals and gasses in unseen smoke.

It bothers me. 
Then
I go back to the job in hand and start a new compost. I put most of my gift in the bottom and then pile on all the fallen leaves from the paths.

The start of the new compost! 
I love leaves! There will be more next week, the oak trees have only just begun to shed their leaves. 


The source of that quote:  "there is no such place as 'away'" originated with Barry Commoner, environmentalist and socialist, as one of his four laws of ecology, published in The Closing Circle in 1971.  Commoner was a leading ecologist, founded the modern environmental movement, was a candidate for President of the United States, and edited Science Illustrated magazine.  He died in 2012, aged 95. 

The four laws are:

Everything is connected to everything else.
Everything must go somewhere.  There is no "away".
Nature knows best
There is no such thing as a free lunch

https://philebersole.wordpress.com/2010/11/21/barry-commoners-laws-of-ecology/
https://en.wikipedia.org/wiki/Barry_Commoner#Four_Laws_of_Ecology
http://online.wsj.com/article/SB10000872396390444138104578030783002905480.html

Wednesday, 20 November 2013

My last minute spring bulb rush

SALE SALE SALE

I was in my local DIY shop earlier this week and spring flowering bulbs were on Sale.
Three packets for the price of one

The sale was so hard to resist - all those lovely bulbs reduced to a third of their normal price. OMG I could buy 30 bulbs for the normal price of 10.

Now a clump of 10 bulbs is beautiful, but three clumps of 10 will make real show!
Here's a clump of 10 red tulips in my garden last spring to whet your appetite....

tulips behind the broad beans

So I went shopping for glue and came home from the DIY Sale with 50 daffodils and 20 blue iris bulbs for my garden and 60 tulips for my next door friends garden.

Planting bulbs late in the year

This isn't the first year I have been lucky to bag a bargain, so I know that bulbs can be difficult to plant this late in the year. 
Here in the South of England it's is almost winter, and most of the garden plants have lost their top growth and gone to ground. This makes it really difficult to tell where things are already planted. 
In my crowded garden I'm bound to dig up something that is already loved, so I don't want to dig big holes for the bulbs. Things have been made worse by the weather, this autumns big rains have saturated the soil with water and my ground is heavy and soggy. Standing on the beds and digging would compact my already heavy clay soil and make a lot of mess.
I'm not downhearted though. Lucky me, I've planted loads of  bulbs late in the year and after now after lots of trial and error, I finally have the perfect tool for this job.

The easy bulb planter

This is a metal bulb planter and it works like a dream. Its a sort of oversized apple corer with a spade handle.

Full size bulb planter
  
In the past I've tried all sorts of hand held bulb planters, none of them were any good.
I found that after three or four bulbs my wrists would get tired. Hand held planters are hard work - bending over or kneeling and pushing on a hand held planter was tiring and time consuming.
So don't waste your money, if your planning on planting a lot of bulbs, skip the hand held planters and treat yourself to a great garden tool. Buy a bulb planter you can push with your feet and stand on.

Here is a close up of the business end. Like a good quality digging spade, mine has boot flanges which make it easy to push in with my wellies or boots.

The cutting end 

I place the planter where I want to put in a bulb.
Put my foot on the flange and push the planter into the ground, the same as using a digging spade. 
If it doesn't slide into the top few inches of the soil easily then I know there is something growing there already! I can move the planter a few inches where there is a gap.

My wellie on the push edge or flange

My planter is steel and has a sharp leading edge. If needed this will cut easily through most top growth of ground cover plants and small shrub roots. Bigger roots and really dry soil will sometimes take two feet on the planter and a good stomp down.

Pushed 7 inches into the soil

I try and be kind to myself and use the bulb planter after a good rain. It's much easier to push through damp soil than dry soil. 
If I'm planting in dry soil, I'll water the area I want to plant in before I plant the bulbs. 
Damp soil also helps the hole stay in shape long enough to get the bulb in. Dry soil often collapses around the hole.
Hole and the cut plug in the planter

A perfect hole - easy for me to get my hand into and place the bulb in the bottom the right way up. 

My hand placing a bulb in the hole

This is how the plugs of soil were coming out of the planter this afternoon. Just how I like them.
When the soil is damp like this the plug will stay stuck together and I can pick it up and push it back in the hole on top of the bulb. 
If I'm planting through weeds I'll push the plug back in upside down, which usually kills the weeds.

The soil plug next to the planter

Guaranteeing a good show from my bulbs

Flowering bulbs are not cheap - so I give them the best start I can. 
  • I push the planter in as far as it will go - about 7 inches. (30cm). This is 3 inches (12cm) deeper than most bulbs like. 
  • I fill the bottom three inches (12cm) of the hole with some good home made compost. Then I put the in bulb.  Three inches of compost in this size hole is two cupped hands full (my hands anyway). 
  • I put another handful in the hole on top of the bulb before I push the plug of garden soil back in. 
The compost will give the new bulb some rich and light soil to root into and guarantees me great flowers for the first year or two. 

I like to dig 5 or 6 holes at a time in a loose circle, with a generous hole space between each hole. I think flowering bulbs look better in clumps than in lines. Near enough together that intertwining  leaves will help support the flowers in windy conditions, but far enough away from each other that the bulbs have room to grow.

I planted them all  - 110 bulbs this afternoon in three hours between the spells of rain and the early autumn sunset. Brilliant.

Wednesday, 13 November 2013

Its leaf fall time


I love this time of the year!  Cool and crisp air - the best weather for doing jobs that work up a sweat. 
My first job of the day is to get the big leaf rake and sweep the paths. Rotted leaves are garden gold, so me and my mate, Doug, have made a new compost bay to take full advantage of this season's bounty.


New compost walls - now what to put in?

Sticks and apples 
The base of my new compost - sticks and apples! The apples are windfalls from a local garden and the sticks will stop the apples just turning into a mush. Next up is all the leaves and dead stuff from around my garden.  Before I finish for the day I will cover this with an inch of soil to stop it smelling

The first days stuff - this will have gone down by 50% by next week
I love making my own compost, I already have two full bays made just like this. Both full and slowly rotting down to give me fantastic and free food for my garden soil.

Most years I make about two square meters (6 square feet) of compost and I can usually fill one of these bays in a year. All the green waste from my kitchen, the house garden and the veg garden goes on. Everything. Including sticks. As well as anything green from the neighbours gardens (I'm the local free and friendly green waste service). It saves me a fortune and makes my garden soil easy to work with and super fertile. 


This is my compost bays last spring, the two right hand ones are both full now, and I should be able to use them this coming spring. The left one is empty, but the pallets are rotted so I am going to replace them all sometime next year.


There is a lot of bulshit talked and written about composts - so here is my no bullshit guide to making great compost.


Pallets make fantastic compost bin walls. They let in some air and rain, keep the heap from falling over, and are generally free or low cost. Stand them on bricks so they don't touch the wet soil and they should last 4 or 5 years. Wire them together and keep them from falling over by driving a few metal garden stakes on the outside. No need to be too precise about it - the compost won't care.

The more sun your compost gets the faster it will "cook", but anywhere will do. All my composts are all in places where its difficult to grow stuff. Be prepared to water your heap it if you place it under a tree or it will take a very long time to rot down.

I use mine as a boundaries between me and my weed infested neighbours!

Size is everything! This size (using four pallets) makes the best compost. It allows me to put in loads of anything without totally filling the compost. Its a very stable shape and has enough mass to cook quickly, weather permitting - within a year.

Make sure your compost touches the soil (No brick or concrete base). All the creepy crawlies that you need to make the compost for you will magically appear on their own if your compost touches the soil.

Fill from the front. First make a wall about a foot thick in the front of the compost with whatever you are putting in. Compact it well by standing on it or hitting it with your spade. Then fill the back until its level with the front. Repeat. 

Everything will rot - so don't worry about putting in woody stuff. I put in all woody stuff that I can snap by hand, I break it up as small as I can be bothered. 
If your branches are too big to snap,  then put them in a pile on their own and then when they are totally dried out (takes about a year),  put a big piece of carpet on them and jump up and down to break them all up. Then they are ready to go in!

Firm it up, get on top and stomp it down. The compost will dip where some areas are rotting quickly and you can fill them up again.

Remember to water well in dry weather or all your worms will leave! A good compost, like the rest of the garden, depends on the weather. A good year with plenty of sun and rain will give a quick result! I water mine in the summer as if it is part of the garden. I put the hose on a small sprinkler and leave on the top for 15 mins.

Cover with a carpet, over the top and all the way down the front.
This stops weeds growing in the compost and keeps the moisture and the heat in.

One side of the compost will always "do" before the rest. Thats just how it is, and I've learned to relax about it. This is caused by the direction of the prevailing wind and rain and where the sun is the hottest. If some of your compost is not properly rotted, never mind. Just chuck it straight in your new one.

Take it easy - take the long view. I never bother to turn my compost. Its just too much hard work. I just wait longer and throw the unrotted stuff on the newer compost.

The key to worry free compost is to fill the compost as full as you can. Size matters, the bigger the heap the better it rots. Once its full, relax and wait. 
When it is down to a third of its full size, then most of it will be ready. Sometimes it will take a year, sometimes two! If its really dry and you don't water it - may be longer......... but in the end, you'll have a free heap of garden gold.

Free compost starter!  I invite all my male friends to pee on my compost. (if you are a woman, consider investing in a "she wee".)  Urine contains an organic nitrogen and all the trace elements and salts that plants need to grow well.  (You got a lot of them eating veg) Using  pee to seed your compost with nitrogen will rot it faster and save you flushing the toilet! 

I've learned not to worry too much about large bits in the compost. 
I only dig it into soil  where I am growing "above ground" crops (not root veg) Unlike root vegetables, these plants don't mind a few lumps in the soil.
Most of my soil will get one lot of home made compost a year. A layer two or three inches thick, depending on how much is made. 
Trees and fruit bushes get a few buckets full around the roots in the spring.

For those really keen gardeners - my organic matter is up to 7%. Which makes my heavy clay soil much lighter, well drained and moisture retaining. Better still, I no longer need to dig with a spade!  Instead I can turn the top 10 inches over easily using a fork. 

ps apologies to those gardening in a desert - I know from friends that this method doesn't work in very dry conditions with termites.


For those keen souls who have read this far :-) 
Here is a photo of my new compost after three weeks of leaves and garden clearing. When I get on top and firm it up it will compact by a third. It'll be full by the end of December and I'll put a carpet on top in late spring.